Length of tutorial: 15 minutes
Difficulty: Easy!
This tutorial will show you how to make a blast server for your own data. It will have a nice graphical interface and only requires a few commands! At then end of the tutorial there is one teeny hacky bit but it’s worth it to make the images look perfect.
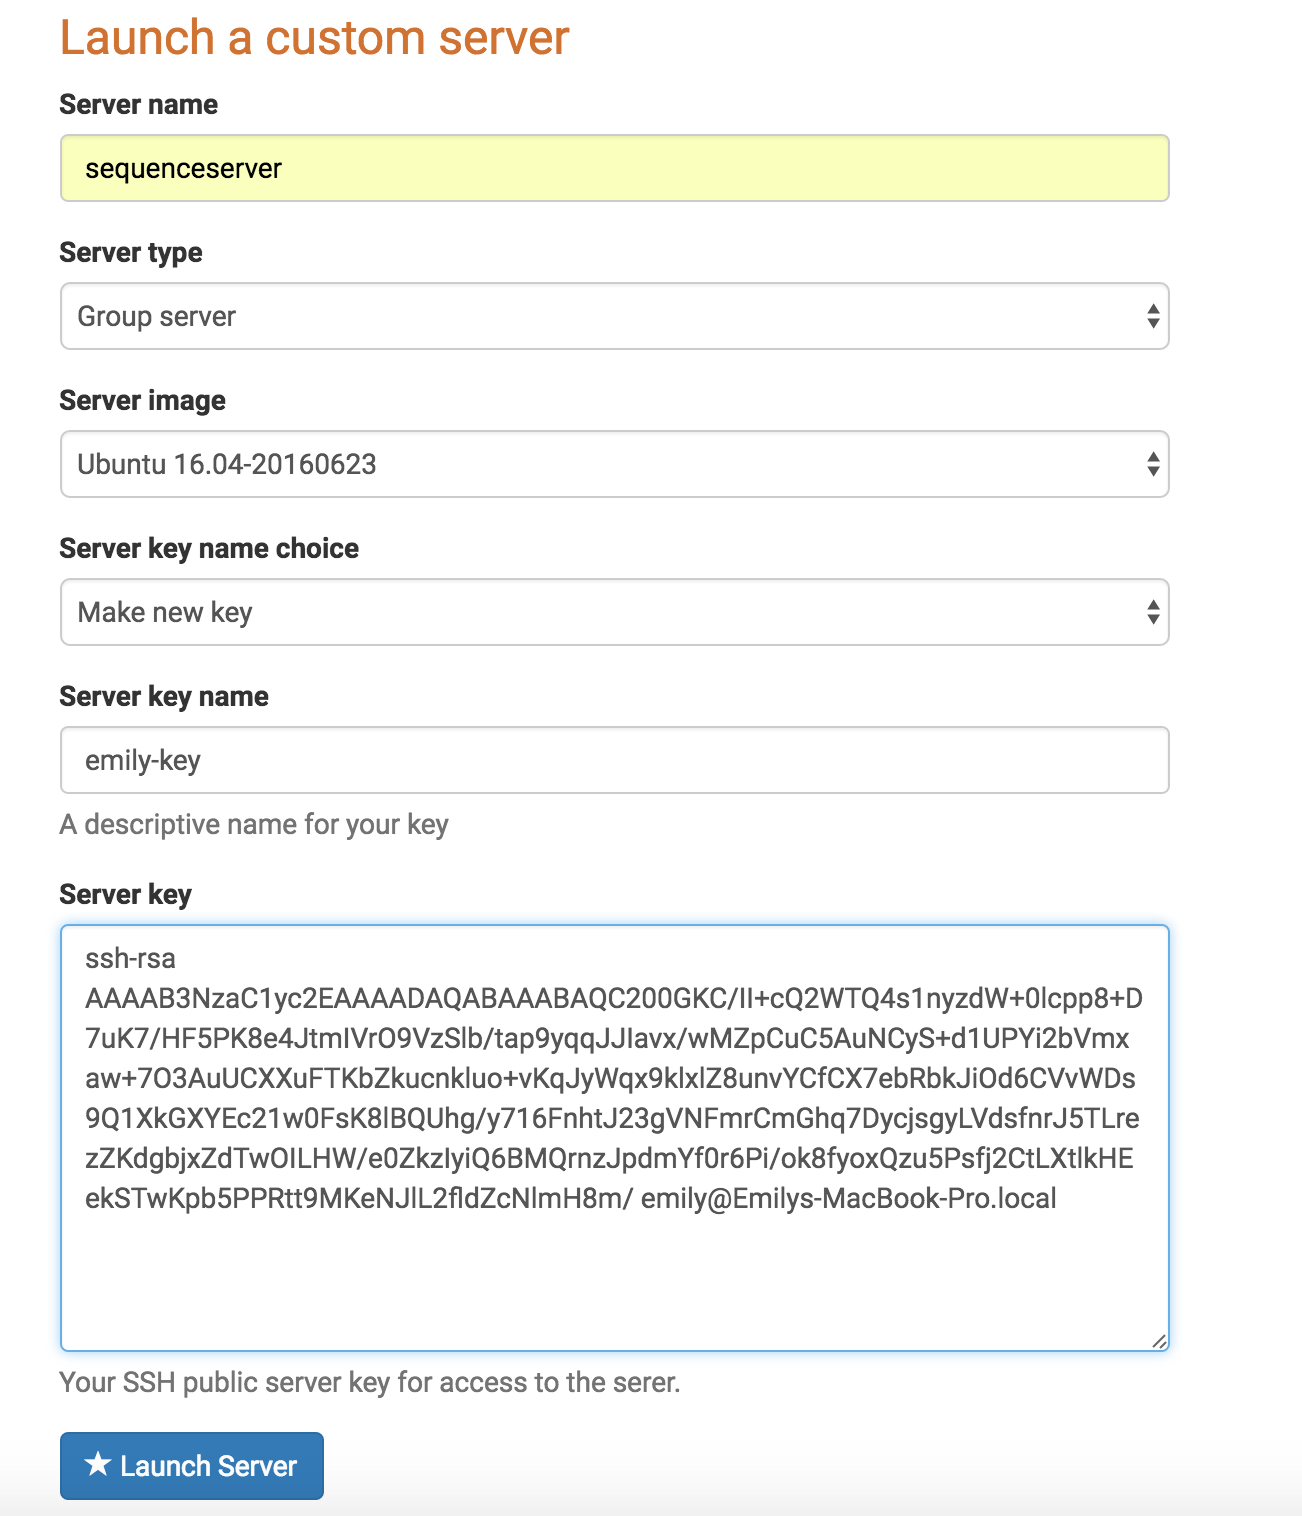
Create a new Ubuntu image
- In Server name put the name that you would like to call your new image
- Select Ubuntu 16.04 in Server image
- Select Make new key in Server key name choice
- You will need to get your public key and paste it into the Server key box
- Press the
 Launch Server button
Wait for your IP Adress to appear…
- You will know it is ready when it appears in the column highlighted
- The IP in the example is
137.205.69.212yours will be something different

SSH into your new image
- Open a terminal and SSH into the VM (use your IP address and the username ubuntu) something like:
SSH ubuntu@137.205.69.215
Install sequenceserver and dependencies
- As you have just created a brand new image of Ubuntu, there is very little installed on there and some things need updating (any prompts type y and press enter):
sudo apt-get update
sudo apt-get install ruby-dev gcc build-essential
sudo apt install ncbi-blast+ - You now need to install sequence server itself:
sudo gem install sequenceserver
Get data for test
- You will need some sequences for the blast database, if you don’t have any to hand use these:
wget http://microbesng.s3.climb.ac.uk/sequenceserver_example.zip
unzip sequenceserver_example.zip
Setup sequenceserver
- Type the following:
sequenceserver -s -b /usr/bin/ -d /home/ubuntu/sequenceserver_example
sequenceserver
- Go to the link #yourIP#:80 (in this tutorial it is http://137.205.69.215:80/ yours will be the one you identified earlier)
Setup sequenceserver to start on boot
- Create this document
/etc/systemd/system/sequenceserver.service(you will need to sudo) and add the following:
[Unit]
Description=SequenceServer
After=network.target
[Service]
User=ubuntu
ExecStart=/usr/local/bin/sequenceserver
WorkingDirectory=/home/ubuntu/
[Install]
WantedBy=multi-user.target
Then run
sudo systemctl enable sequenceserver
sudo systemctl start sequenceserver
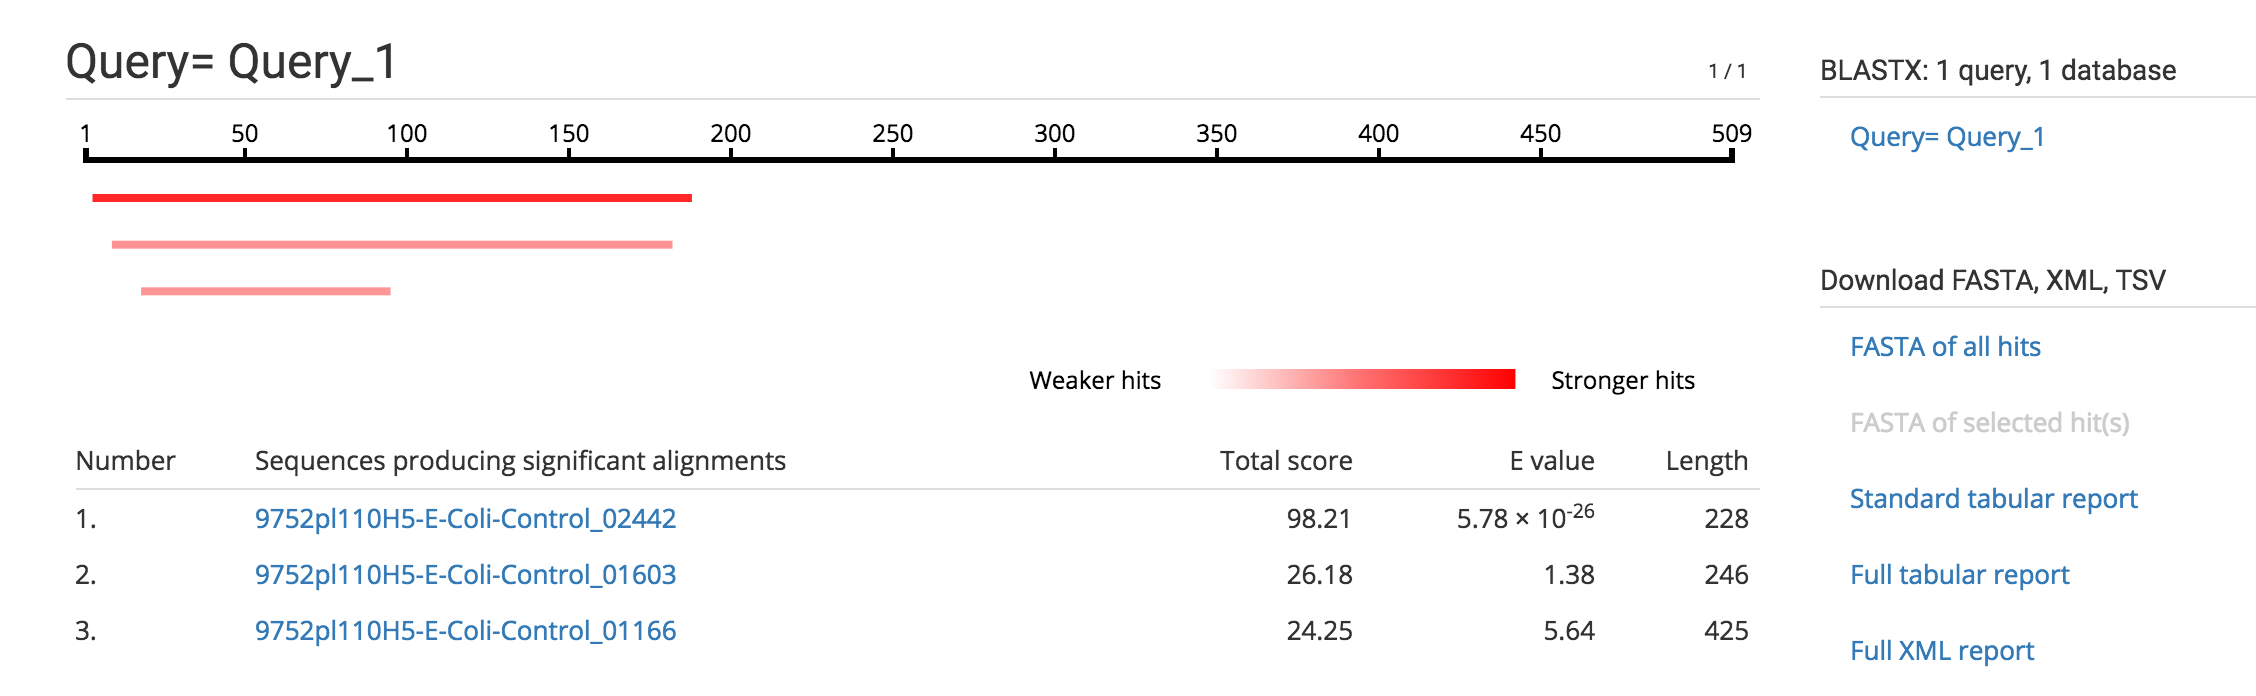
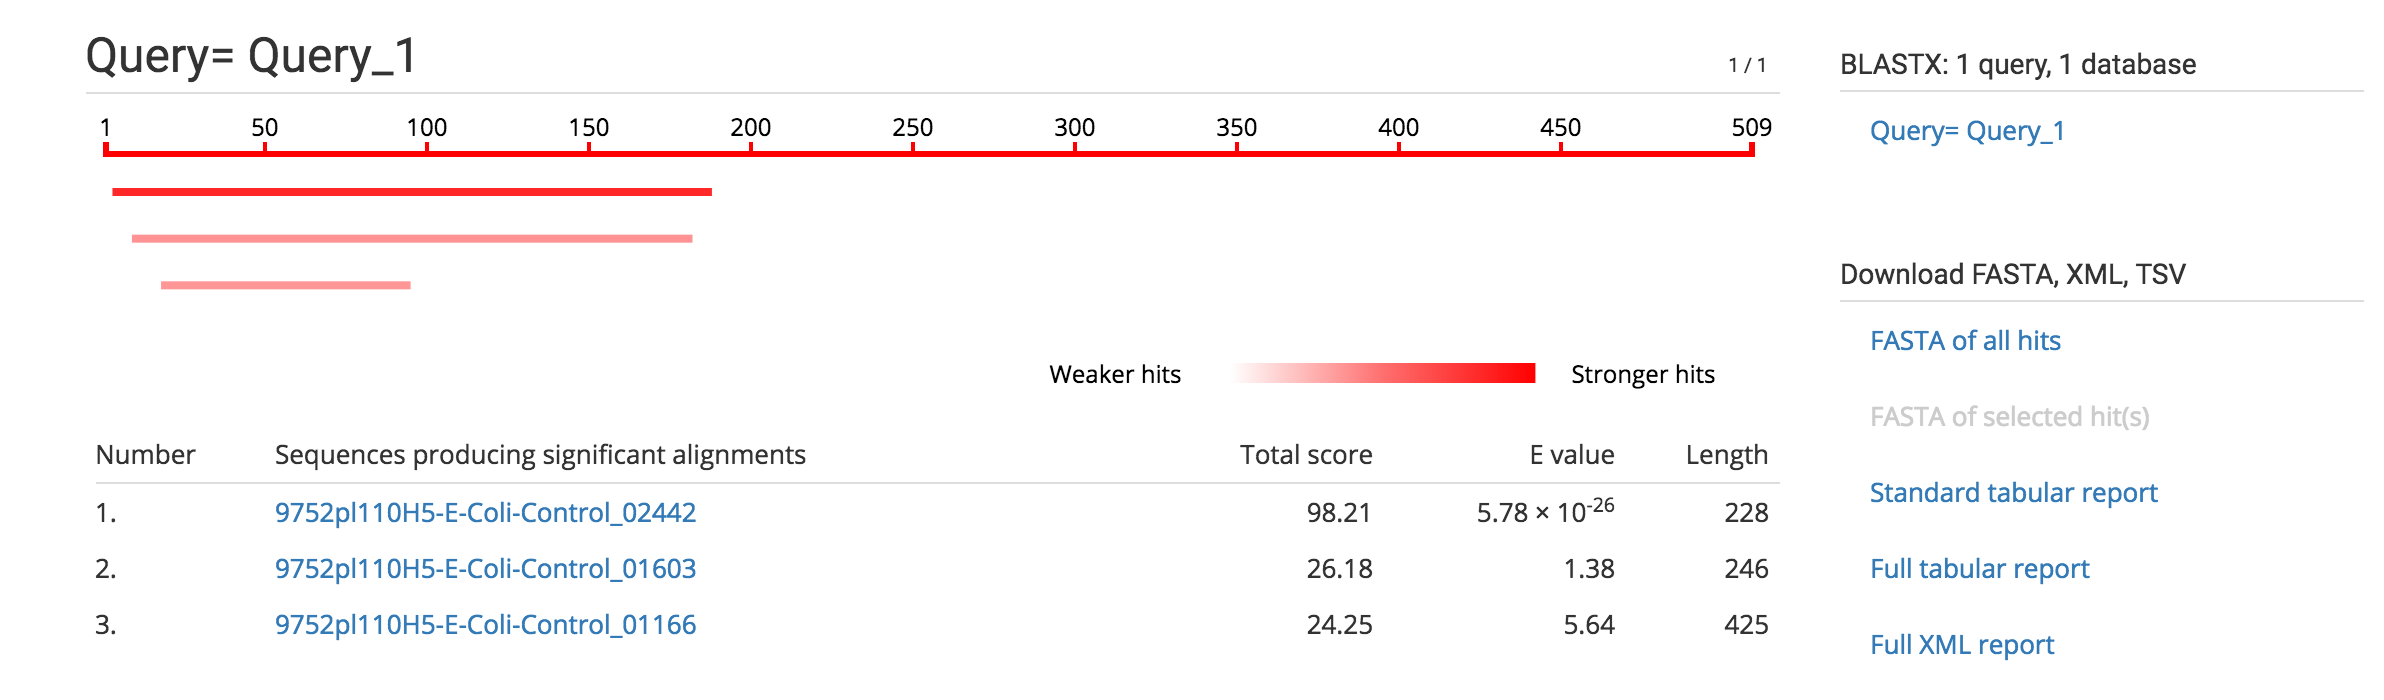
Improve display colours
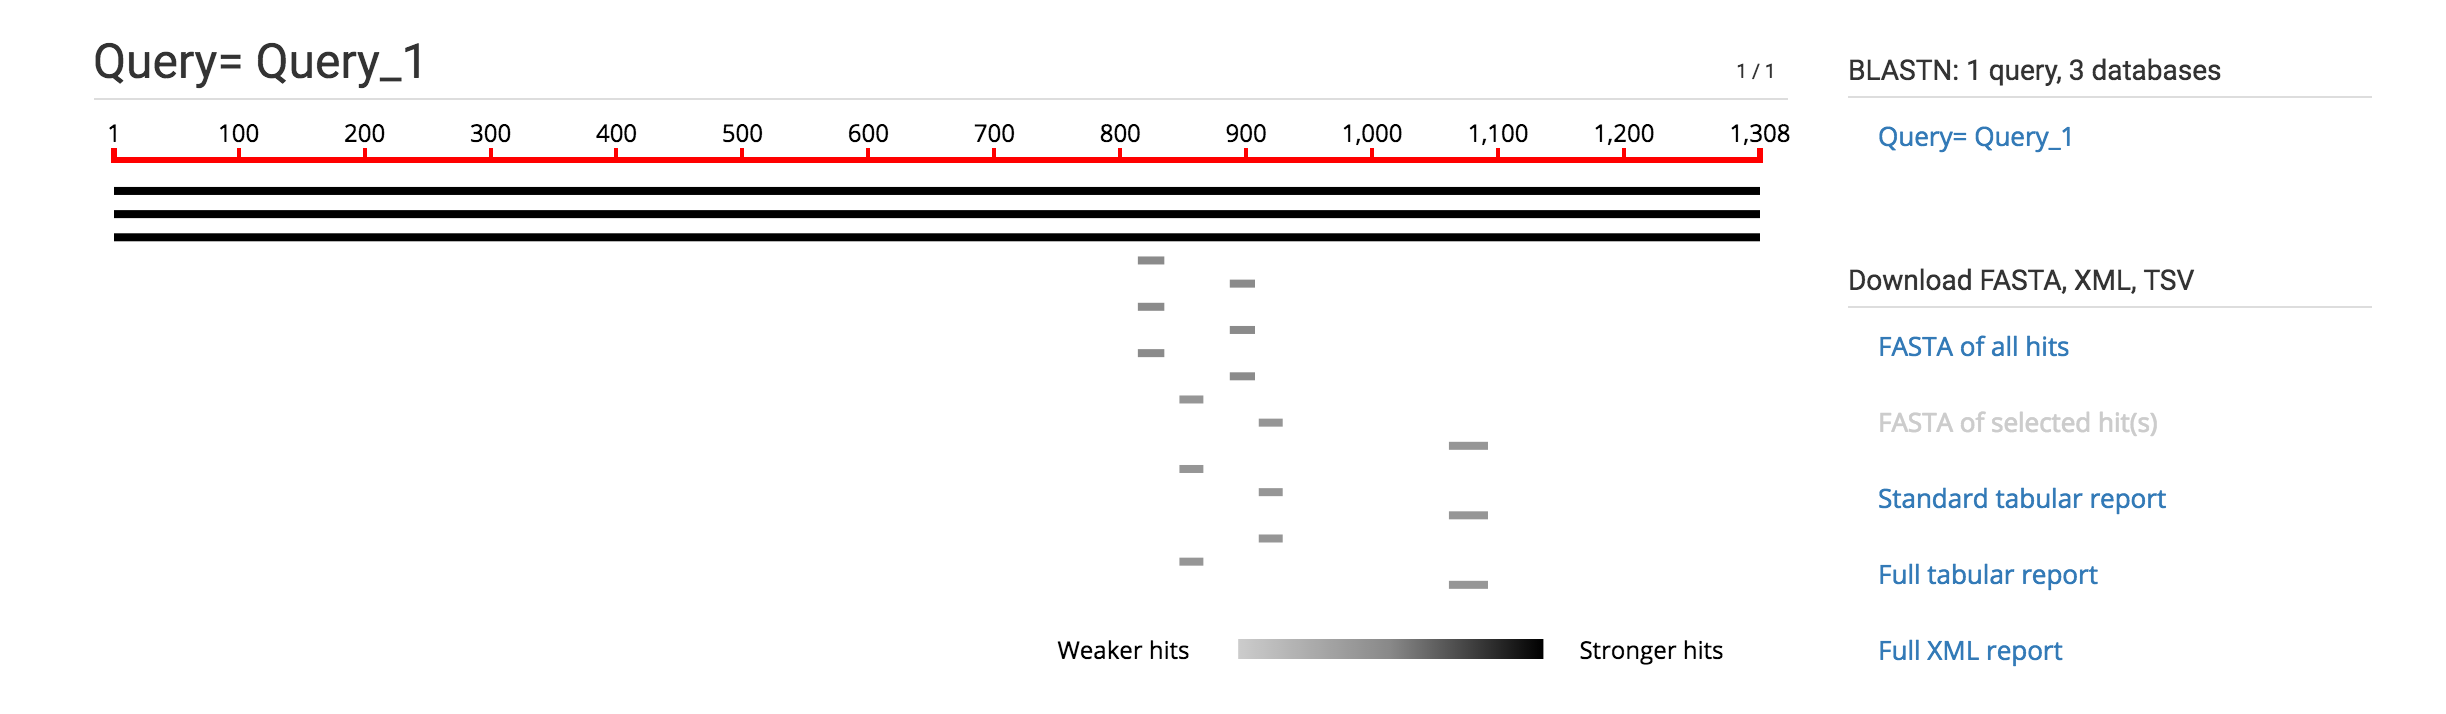
- You’ll notice the example sequenceserver at the top has nice red bars, rather than the default black bars shown here. You need to open the file and change the following (using sudo):
d3.rgb(y(d.hitEvalue),y(d.hitEvalue),y(d.hitEvalue))
TO
d3.rgb(255,y(d.hitEvalue),y(d.hitEvalue))
AND
{offset:“0%”,color:"#ccc"},{offset:“50%”,color:"#888},{offset:“100%”,color:"#000"}
TO
{offset:“0%”,color:"#FFFFFF"},{offset:“50%”,color:"#FF6F6F"},{offset:“100%”,color:"#FF0000"}
Improve headers
- If you are including databases made up of contigs from multiple samples it might be unclear which are which. Adjusting the headers to include the sample name is simple with this one liner:
for f in /home/ubuntu/sequenceserver_example/*.fasta ; do name=${f%.fasta} ; sed 's/>\(NODE.*\)_length.*/>'${name##*/}'__\1/'g -i $f ; done - You’ll need to make your blast databases again, a loop can make this really quick:
cd /home/ubuntu
for f in /home/ubuntu/sequenceserver_example/*fasta ; do makeblastdb -dbtype nucl -title ${f%.fasta} -in $f ; done